MProfit lets you auto-import your transaction files by forwarding them via email directly to your MProfit account. This is a very useful feature for importing Stock contract notes and Mutual Fund mail-back files like NSDL eCAS and Distributor Files.
To fully automate importing for such files, you can set up an auto-forward rule in your email inbox.
With auto-import enabled, your MProfit portfolios will always stay updated without requiring manual effort.
To get started with auto-import, first log in to the MProfit app on browser at https://cloud.mprofit.in.
Upon logging in, click Import at the top-right. Next, add the template (for which you want to set up Auto-import) to My Templates.
In the My Templates section, click the Auto Import button under the template you are setting up auto-import for. (screenshot below)
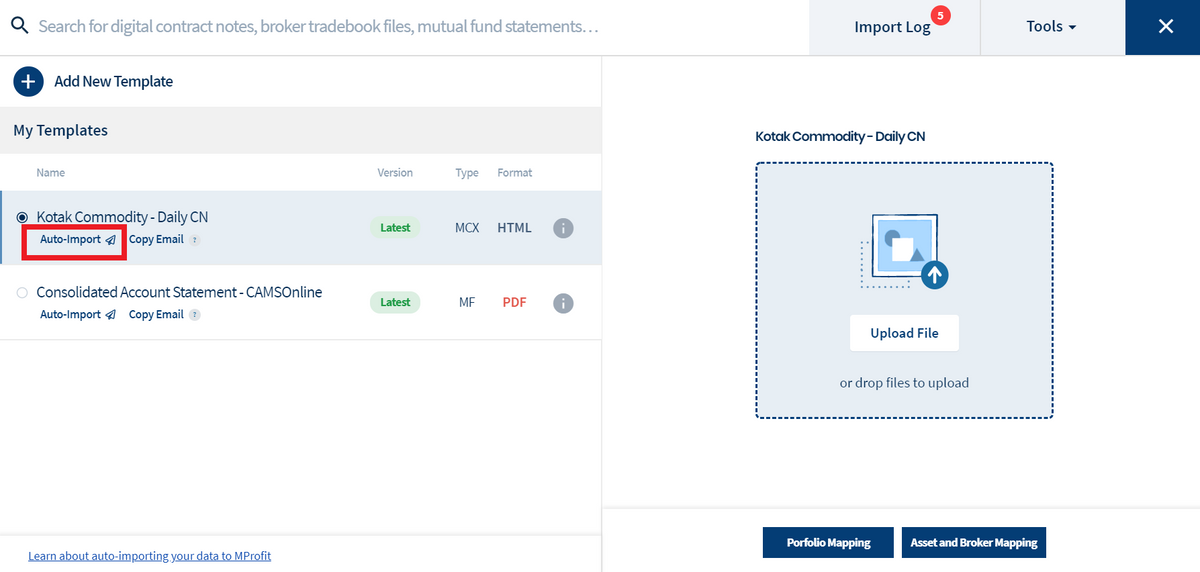
Follow the steps in the subequent window to set up auto-import for your template.
For reference, we have included the auto-import steps for Gmail users in this article. If you use another email service provider, please click the corresponding link below:
Auto-import for Outlook / Hotmail users
If you don't use Gmail, Outlook/Hotmail or Yahoo Mail but would like to set up auto-import, kindly check with your email provider or IT administrator if it is possible for you to set up forwarding rules in your email.
Gmail does not allow users to set up forwarding rules from a Mobile device.
Therefore you will have to login to your Gmail account on a computer device.
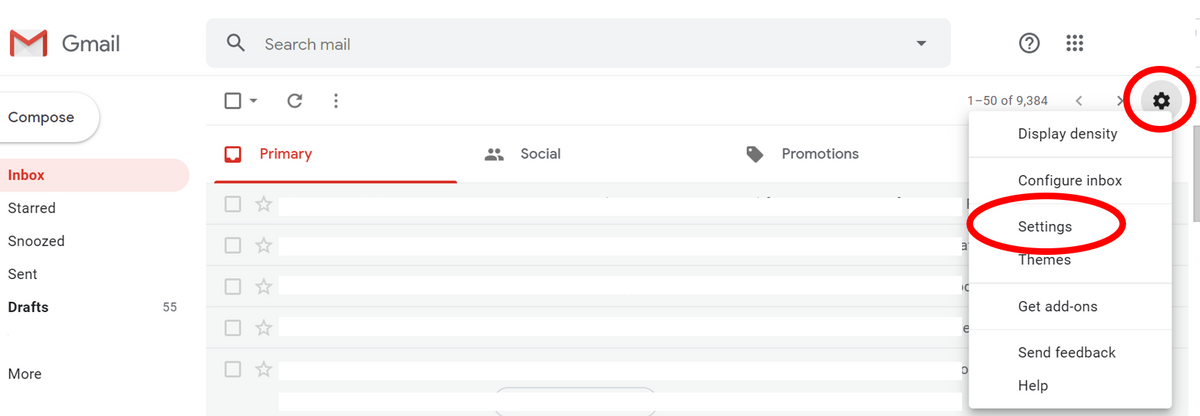
In your Gmail inbox, click the Settings icon at the top right and click Settings from the dropdown.
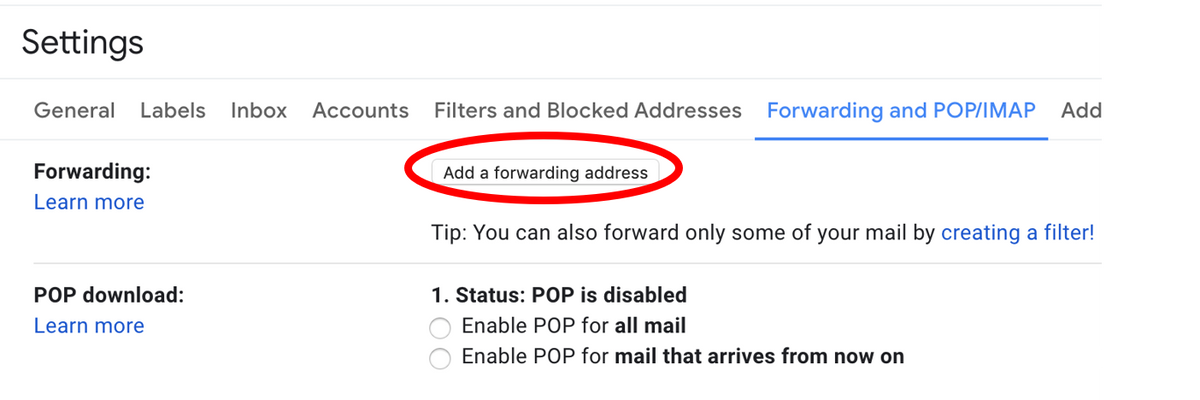
Under Settings, go to the Forwarding and POP/IMAP tab and click the Add a forwarding address button.
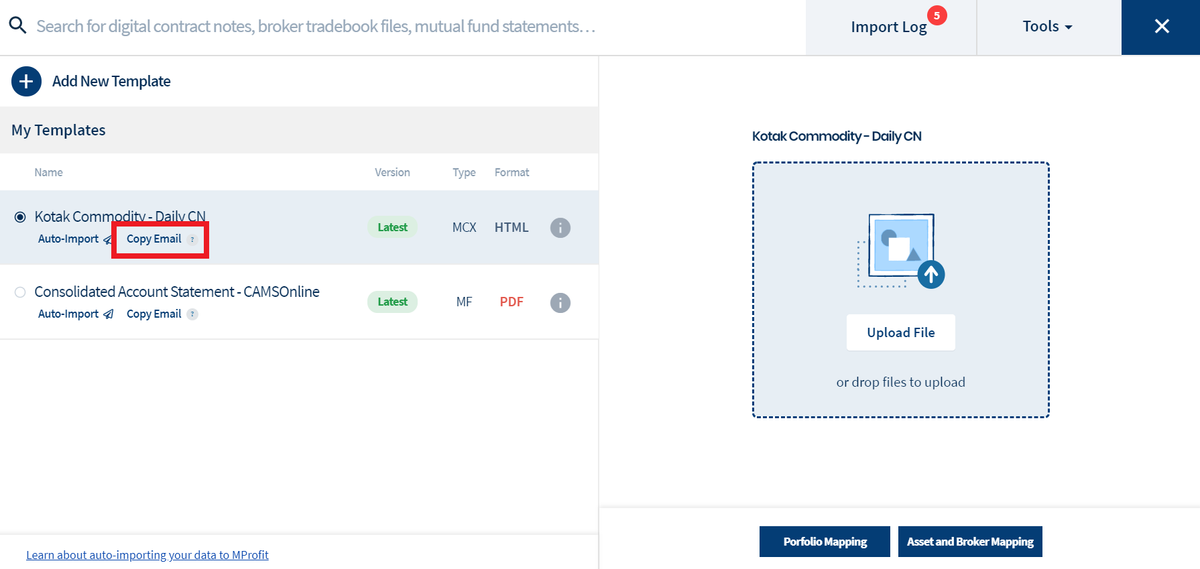
Under My Templates in the Import modal, find the template for which you want to set up Auto-import.
For this template, click the Copy Email button under the template.
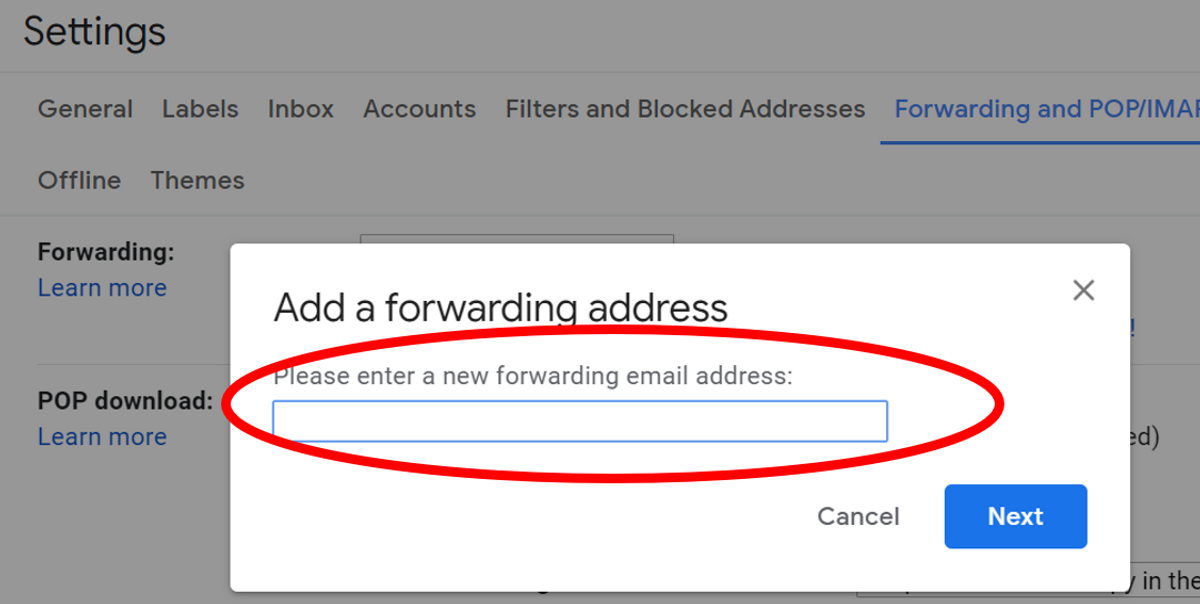
Now paste the copied email into the Add a Forwarding Address pop-up in the Gmail app. Click Next, and then click Proceed on the pop-up that appears next.
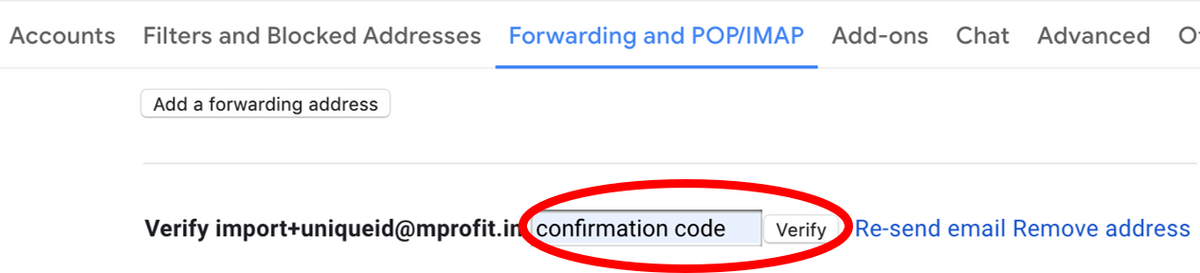
A confirmation code to verify permission will be emailed to you from MProfit. Please check your email for the code.
Copy the code and paste it in the confirmation code box in Gmail. Next click Verify.
The auto-import email is now successfully verified and you can proceed with setting up the auto-forward rule.
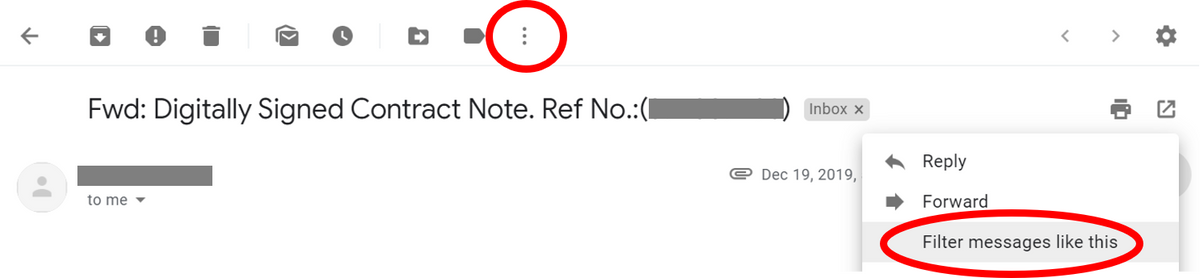
Go back to your Gmail inbox and find the email containing the file that you want to auto-import to MProfit.

Open the email, click the "More" button on the right and then click Filter messages like this.
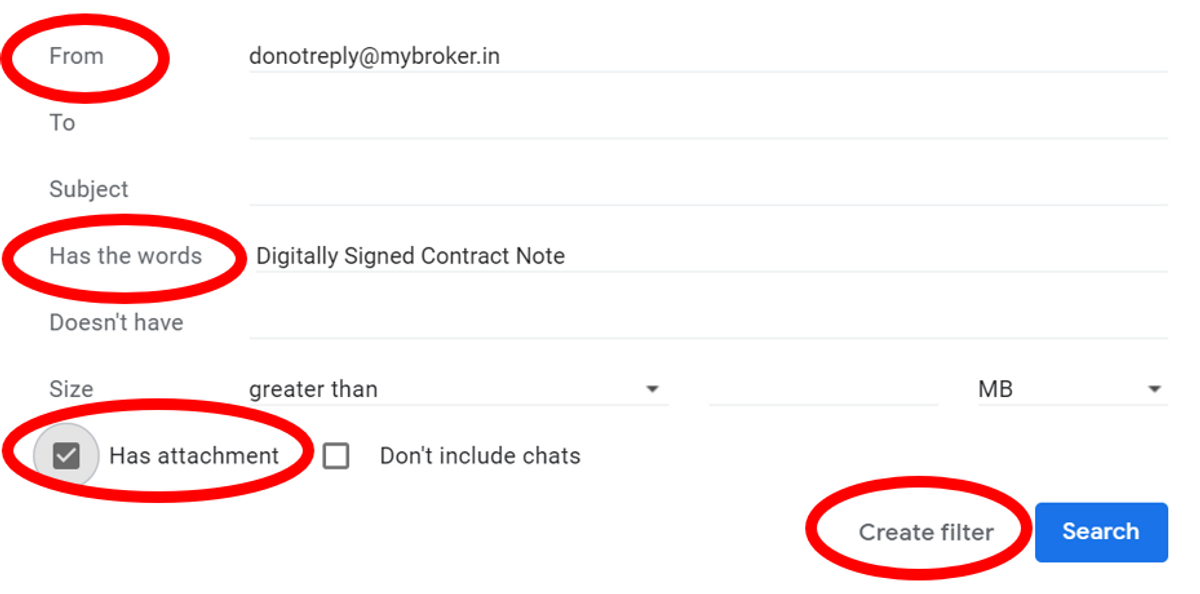
In the subsequent pop-up box, you will be required to set the rule to filter only those emails that need to be auto-forwarded to MProfit.
Helpful tips:
- Specify a From Email (example: donotreply@mybroker.in)
- Specify distinct keywords under the Has the words field, that are always part of the Subject for such emails (example: "Digitally Signed Contract Note")
- Check the Has attachment box to ensure that only emails containing files to be imported are forwarded.
After setting your rules, click Create filter.
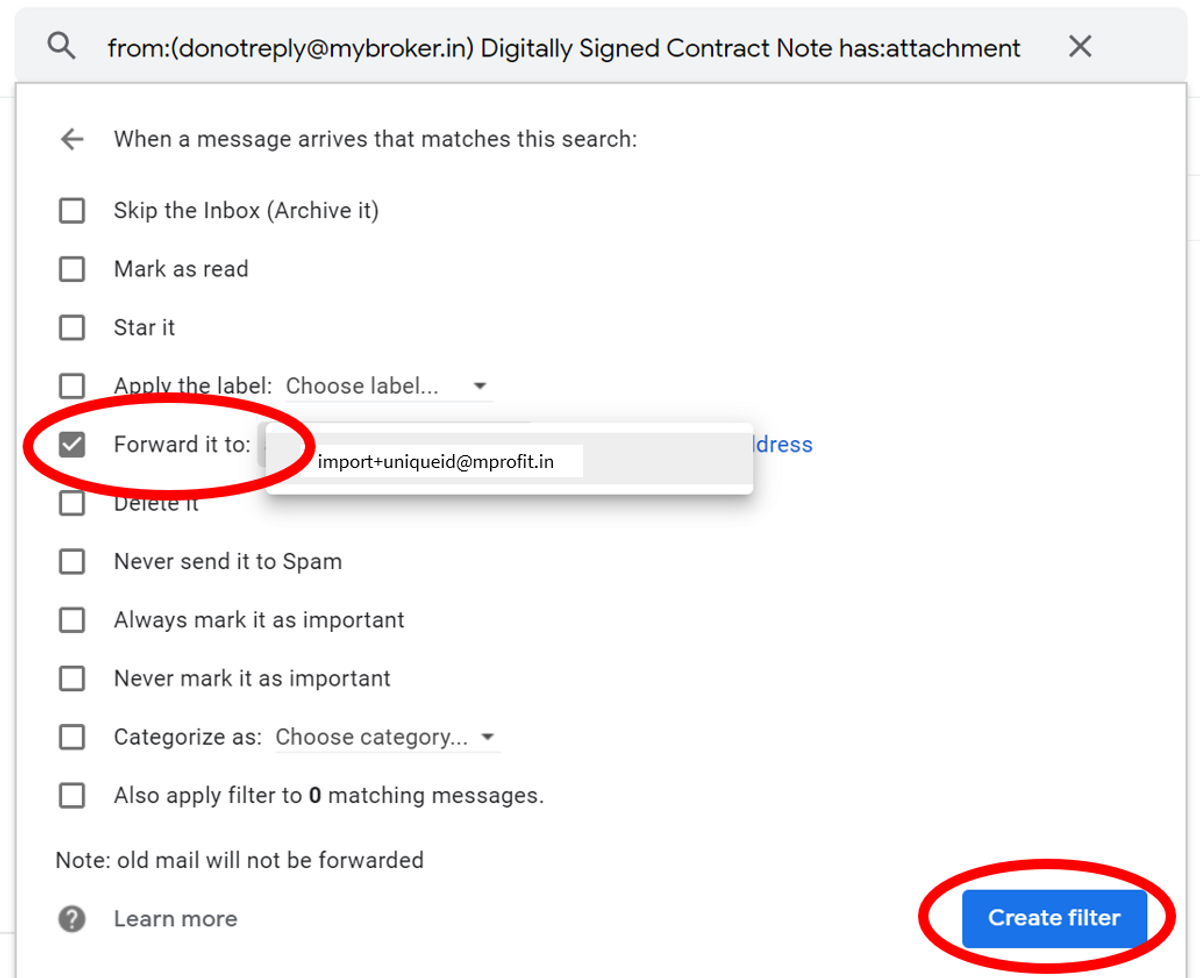
In the subsequent window, check the Forward it to box and select the unique auto-import email previously added.
Finally, click Create filter.
You will now see the newly created filter in the Filters and Blocked Addresses tab under Settings.